If you’ve ever opened up your thermostat and found just four wires, or worse, no common wire at all, you’ve probably hit a wall trying to upgrade to a smart model. Most smart thermostats need continuous power, which requires either a C-wire or a workaround that involves running new wiring through your walls. Battery powered smart thermostats solve that problem entirely. They run on standard batteries, install in minutes, and still give you all the scheduling, remote access, and energy-saving features you’d expect from a connected device. For homes with older HVAC systems or anyone who doesn’t want to fish wire through finished walls, they’re a legitimate upgrade path.
Table of Contents
ToggleKey Takeaways
- Battery powered smart thermostats eliminate the need for a C-wire by running on standard AA or lithium batteries, making installation faster and ideal for older homes without complex wiring modifications.
- These devices use low-power wireless protocols like Zigbee or Thread and smart power management to maintain Wi-Fi connectivity, scheduling, and remote access while avoiding the continuous power drain of traditional smart thermostats.
- Installation takes under 20 minutes for most DIYers—simply pop in batteries, connect existing HVAC wires to the baseplate, and sync with your smartphone or smart home hub.
- Battery life ranges from 8–24 months depending on screen type and usage; e-ink displays last longer than color touchscreens, and most models alert you weeks before power depletion.
- Key features worth prioritizing in a battery powered smart thermostat include geofencing for location-based mode switching, multi-room remote sensors for even temperature distribution, and energy tracking to monitor savings.
- Thread-enabled and Matter-compatible models offer better reliability and cross-platform flexibility than older proprietary Zigbee systems, so confirm compatibility before purchasing.
What Is a Battery Powered Smart Thermostat and How Does It Work?
A battery powered smart thermostat is exactly what it sounds like: a thermostat that runs entirely on AA or lithium batteries instead of drawing power from your HVAC system’s control wiring. Most traditional thermostats can work without a C-wire because they only need tiny bursts of power to flip a mechanical switch or trigger a relay. Smart thermostats, though, need continuous power to maintain Wi-Fi, run a color touchscreen, and process scheduling algorithms, tasks that drain far more juice.
Battery models get around this by using low-power wireless protocols (usually Zigbee or Thread instead of Wi-Fi), e-ink or low-refresh displays, and aggressive power management. Instead of staying connected 24/7, some models check in with your router or hub periodically to sync changes. Others use a dedicated hub that handles the heavy lifting while the thermostat itself stays in a low-power state.
These devices still control your heating and cooling the same way a standard thermostat does, by completing a circuit between your HVAC system’s R-wire (power) and the appropriate call wire (W for heat, Y for cooling, G for fan). The batteries only power the thermostat’s logic board and user interface, not the furnace or air handler.
It’s worth noting that “battery powered” doesn’t always mean “completely wireless.” You’ll still need to connect the thermostat to your existing HVAC control wires, it’s just that the thermostat itself doesn’t pull power from those wires. If you’re in a home with no existing thermostat wiring at all, you’ll need to look at standalone smart AC controllers or ductless mini-split systems instead.
Top Benefits of Going Wire-Free with Your Thermostat
The biggest advantage is obvious: no need for a C-wire. If your home was built before the mid-1990s, there’s a decent chance your thermostat only has four wires (R, W, Y, G) or even fewer. Adding a C-wire means either hiring an HVAC tech to run 18/8 thermostat wire from your furnace, installing a power extender kit at the air handler, or using a plug-in transformer near the thermostat. All of those options cost money and time. Battery models eliminate that entirely.
Installation is faster and less intimidating for DIYers. You’re not troubleshooting whether your system can provide enough milliamps on the C-wire, and you’re not second-guessing if you wired the adapter correctly. Pop in batteries, mount the baseplate, connect the existing wires, and you’re done. Most installs take under 20 minutes.
Battery powered models also work in situations where running new wire isn’t practical, think plaster walls, tile backsplashes, or homes where the thermostat is far from the HVAC equipment. They’re ideal for rental properties where tenants want smart features but landlords won’t approve modifications, or for vacation homes where you want remote monitoring without rewiring an older system.
Easy Installation Without a C-Wire
Skipping the C-wire means you’re not opening up your furnace cabinet or air handler, which is a big deal if you’re not comfortable working around 120V circuits or gas valves. You also avoid compatibility headaches with older systems that can’t supply the 20–40mA most smart thermostats draw continuously. Some HVAC control boards (especially on budget furnaces or boilers) don’t have a C-terminal at all, even if your system is relatively new.
Battery models also sidestep the “phantom call” problem, where underpowered smart thermostats cause short-cycling or ghost signals that confuse the furnace. Since they’re not backfeeding voltage through control wires, they play nicer with finicky or non-standard HVAC setups.
Best Battery Powered Smart Thermostats for Your Home
As of 2026, the market has matured enough that you’re no longer choosing between “smart” and “battery powered”, you can have both. The Ecobee SmartThermostat models still lead in features, with many battery-powered options offering remote sensors, voice control, and robust scheduling. Ecobee’s Premium model runs on batteries when needed and includes air quality monitoring.
The Honeywell Home T9 is a solid middle-ground option. It uses AA batteries, supports multiple room sensors, and integrates with Alexa, Google Assistant, and Apple HomeKit. Battery life averages 12–18 months depending on how often you adjust settings manually. The T9’s geofencing works reliably, and it handles multi-stage heating and cooling without issue.
For budget-conscious buyers, the Emerson Sensi Touch offers a simple interface and works with most HVAC systems, including heat pumps and multi-stage setups. It’s not as feature-rich as Ecobee or Nest models, but at half the price, it’s a practical choice for straightforward heating and cooling control.
If you’re already invested in a smart home ecosystem, check compatibility carefully. Many top-rated smart thermostats now use Matter protocol, which lets them work across platforms without being locked into one brand’s app. Thread-enabled models connect through your existing HomePod, Echo, or Google hub, which means faster response times and better reliability than Wi-Fi.
Avoid older models that rely solely on proprietary Zigbee hubs, those are being phased out as manufacturers shift to Thread and Matter. And if you have a heat pump with auxiliary heat, confirm the thermostat supports O/B wire configuration: not all battery models do.
Installation Guide: Setting Up Your Battery Powered Smart Thermostat
Before you start: Turn off power to your HVAC system at the breaker or furnace switch. Don’t rely on just removing the old thermostat, you’re working with low-voltage control wires, but the furnace itself is still energized.
Tools you’ll need:
• Phillips and flathead screwdrivers
• Drill with a 3/16″ bit (if mounting holes don’t line up)
• Wire labels or painter’s tape
• Smartphone for setup
• Level (optional, but helpful)
Step-by-step installation:
-
Remove the old thermostat. Pop off the faceplate and unscrew the baseplate from the wall. You’ll see a bundle of thin wires (usually 18-gauge) connected to terminals labeled R, W, Y, G, and possibly others. Take a photo before disconnecting anything.
-
Label the wires. Most thermostats come with stickers, wrap one around each wire and mark it with the terminal letter it was connected to. If two wires share a terminal (like dual-transformer systems), note that.
-
Install the new baseplate. Thread the wires through the center opening and screw the plate to the wall. If the old screw holes don’t line up, use the included anchors and drill new holes. Check level, crooked thermostats drive people crazy.
-
Connect the wires. Match each labeled wire to the corresponding terminal on the new thermostat. Most battery models use a screwless connector system, just push the wire in until it clicks. Common configurations: R (red) to R or Rc, W (white) to W1, Y (yellow) to Y1, G (green) to G. If you have a C-wire, leave it capped, you won’t need it.
-
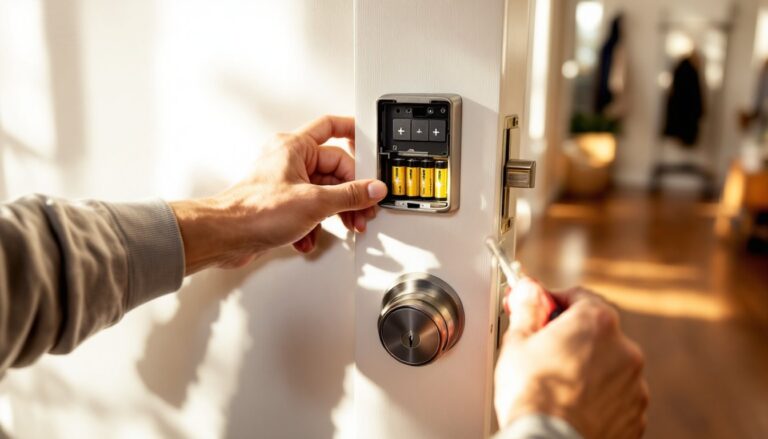
Insert batteries into the thermostat body (usually behind the faceplate or in a side compartment). The screen should power on immediately. If it doesn’t, double-check wire connections and confirm the batteries are seated correctly.
-
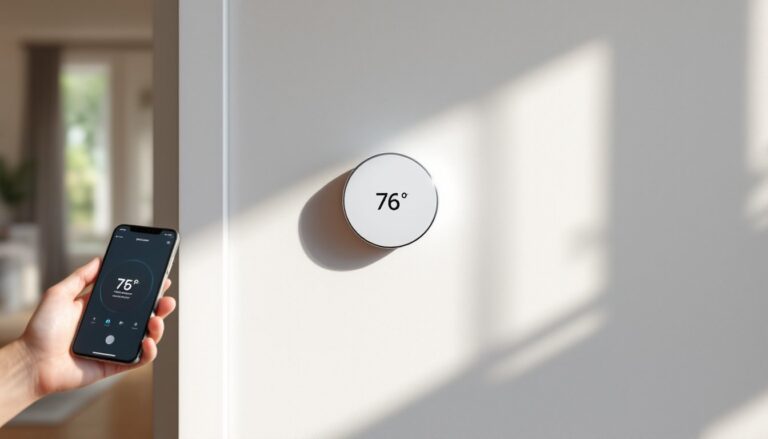
Mount the faceplate and follow the on-screen prompts to connect to Wi-Fi or pair with your smart home hub. You’ll need your network password and the manufacturer’s app installed on your phone.
-
Restore power at the breaker and test a heating and cooling cycle. Set the thermostat a few degrees above room temp and confirm the furnace kicks on. Then set it below room temp and verify the AC responds.
If your system doesn’t respond, recheck wire connections and consult the thermostat’s compatibility chart. Some systems (like millivolt fireplaces or line-voltage baseboard heaters) aren’t compatible with standard smart thermostats at all.
Battery Life and Maintenance: What to Expect
Battery life varies widely depending on usage, screen type, and wireless protocol. E-ink models like some Honeywell units can run 18–24 months on a set of AAs. Color touchscreens with always-on displays drain faster, expect 8–12 months. If you’re constantly adjusting the temperature manually or running the screen through the app, you’ll burn through batteries quicker.
Most thermostats give you a low-battery warning two to four weeks before they shut down, usually via app notification and an on-screen icon. Keep a spare set of alkaline or lithium AAs handy, don’t use rechargeable NiMH batteries, as they have slightly lower voltage and can cause erratic behavior.
Some models (like certain smart thermostat picks) include a battery backup that kicks in if your HVAC system loses power, keeping your settings intact. That’s a nice feature if you live in an area with frequent outages.
Maintenance tasks:
• Replace batteries annually, even if the low-battery warning hasn’t triggered
• Wipe the screen with a microfiber cloth every few months, dust buildup affects touchscreen responsiveness
• Check wire connections once a year: vibration from the furnace can loosen terminals over time
• Update firmware through the app when prompted, manufacturers push bug fixes and feature improvements regularly
If your thermostat starts acting flaky, screen freezes, missed schedules, connectivity drops, try a power cycle. Pull the batteries for 30 seconds, then reinsert. That clears the logic board and often fixes glitches.
Smart Features Worth Having in a Battery Powered Model
Not all smart features are created equal, and some barely justify the upgrade. Here’s what actually matters:
Geofencing uses your phone’s location to switch modes when you leave or return home. It’s more reliable than schedule-based automation and adapts to irregular routines. Make sure it supports multiple users, single-phone geofencing fails when one person is home and the other isn’t.
Remote sensors are a game-changer in homes with uneven heating or cooling. Place sensors in bedrooms or problem areas, and the thermostat averages temps across multiple rooms instead of relying on one hallway reading. Ecobee and Honeywell both offer wireless sensors that pair directly with the thermostat.
Energy reports track runtime and show how much you’re heating or cooling compared to similar homes. Some models estimate cost savings based on local utility rates, which helps justify the investment.
Voice control through Alexa, Google Assistant, or Siri is convenient but not essential. It’s handy if your hands are full or you’re already deep in a smart home ecosystem. Skip it if you’re not using voice assistants elsewhere.
Smart integrations with IFTTT, SmartThings, or Home Assistant let you build complex automations, like “turn off heat when garage door opens” or “boost AC when indoor air quality drops.” Power users will appreciate the flexibility: casual users won’t touch it.
What you don’t need: Learning algorithms that “predict” your schedule (they’re often wrong and annoying), weather-based adjustments that override your settings without asking, or touchscreens with animations and widgets that drain batteries for no functional benefit. Focus on features that solve a specific problem in your home, not marketing bullet points.