Blink has carved out a significant niche in the smart security market by delivering reliable cameras that won’t drain your wallet or require complex hardwiring. Owned by Amazon since 2017, Blink focuses on battery-powered simplicity and no-frills performance, making it a practical choice for renters, DIYers, and homeowners who want security without a professional install or monthly contract. This guide walks through what sets Blink apart, how the systems work in real-world conditions, and whether the optional subscription plan makes sense for different setups.
Table of Contents
ToggleKey Takeaways
- Blink smart security cameras operate battery-powered without mandatory subscriptions, offering live view and motion alerts for free while maintaining Amazon Alexa integration for seamless smart home control.
- Battery life typically ranges from 18-24 months with AA lithium batteries, though high-traffic areas and cold weather may reduce this timeline, with optional USB power adapters and solar panels available for extended use.
- The Blink system supports up to 10 cameras via the Sync Module 2 hub, which requires local USB storage for free clip recording or a $10/month Blink Plus subscription for cloud storage and person detection across unlimited cameras.
- Setup takes under 30 minutes using the mobile app without professional installation—mount cameras 7-10 feet high, scan QR codes, and adjust motion sensitivity zones to minimize false alerts from environmental triggers.
- Blink smart security works exclusively with Alexa and 2.4GHz Wi-Fi networks, limiting compatibility with Apple HomeKit or Google Home, making it essential to verify ecosystem alignment before purchasing.
What Makes Blink Smart Security Different?
Battery-powered operation defines Blink’s design philosophy. Most models run on two AA lithium batteries rated for up to two years under typical use, ideal if you’re mounting cameras on a detached garage, fence post, or anywhere pulling low-voltage wire isn’t practical. This contrasts with wired systems that need a 12V transformer or PoE switch.
No mandatory subscription is the second major differentiator. Out of the box, Blink cameras offer live view, two-way audio, and motion alerts, all without recurring fees. Recorded clips require either a USB drive plugged into the Sync Module 2 or an optional cloud subscription. For DIYers who already manage local backups for other devices, this flexibility matters.
Amazon Alexa integration is native and seamless. Blink cameras appear automatically in the Alexa app, enabling routines like “Alexa, arm the garage camera” or viewing live feeds on Echo Show devices. The tight integration reflects Amazon’s ownership, and while it limits cross-platform flexibility, it works well for households already invested in Alexa-enabled devices.
1080p resolution is standard across current models, adequate for identifying package thieves or verifying who’s at the door, though not quite as detailed as 2K or 4K systems when digitally zooming footage. Reviews from Tom’s Guide highlight motion detection as a practical strength, noting quick alerts and minimal false positives in typical suburban settings.
Key Features of Blink Security Systems
Motion detection zones let users mask areas like busy streets or swaying tree branches that trigger unnecessary alerts. The app interface uses a simple grid overlay, drag to define active zones. Sensitivity adjusts on a five-step scale: outdoor cameras usually work best at level 3 or 4 to avoid wind-blown foliage activating recording.
Night vision relies on infrared LEDs with a working range of about 20 feet in total darkness. Image quality drops noticeably beyond that distance, so position cameras within 15 feet of the area you’re monitoring for clearest after-dark footage. The IR illuminator is invisible to the human eye but shows as a faint red glow on the camera face.
Two-way audio uses a built-in speaker and microphone. Audio quality is functional, clear enough for “Leave the package by the door” but not speakerphone-grade. Expect a 1–2 second delay in live view mode, which is typical for battery-powered systems that wake from standby.
Sync Module 2 acts as the system hub, connecting up to 10 cameras to your home Wi-Fi. It also provides local storage via a standard USB flash drive (not included). Any USB 2.0 or 3.0 drive works: a 32GB stick stores roughly 40,000 clips at default quality settings. The Sync Module requires a wired Ethernet connection to your router and a standard 5V USB power adapter.
Battery Life and Power Options
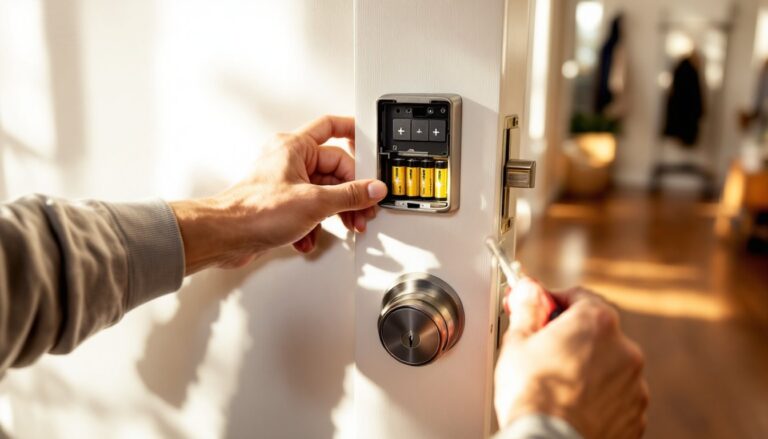
Two AA lithium batteries power most Blink models. Energizer Ultimate Lithium or Amazon Basics lithium work reliably: alkaline batteries drain faster in cold weather and aren’t recommended below 32°F. Actual lifespan depends on activity, a camera recording 20 clips per day typically lasts 18–24 months, while high-traffic areas may need replacement closer to 12 months.
Optional USB power adapters eliminate battery changes for cameras near outlets. Use a Micro-USB to USB-A cable and a 5V/1A adapter. Route the cable through a weatherproof gland if running outdoors: standard indoor-rated cable insulation degrades under UV exposure.
Solar panel accessories work with outdoor models and maintain charge in climates averaging three hours of direct sunlight daily. In northern latitudes or heavily shaded locations during winter, expect to swap batteries occasionally. Mount the panel south-facing (in the Northern Hemisphere) and tilted to match your latitude for optimal year-round collection.
Setting Up Your Blink Smart Security System
1. Download the Blink Home Monitor app (iOS or Android). Create an account using an email address. The app walks through setup with illustrated prompts, no manual needed for basic installs.
2. Power on the Sync Module by connecting it to your router via Ethernet cable and plugging in the USB power adapter. Wait for the solid blue and green lights. If the light blinks red, check cable seating and router port activity LEDs.
3. Add the Sync Module in the app by tapping the “+” icon, selecting “Sync Module,” and scanning the QR code on the back of the unit. The app detects the module within 10–15 seconds if your phone and router are on the same 2.4GHz network. Blink does not support 5GHz-only routers.
4. Mount cameras before adding them to the system so you can test the live view angle. Use the included mounting bracket and two #6 × 1¼-inch wood screws for wood siding or trim. For masonry, drill 3/16-inch holes with a masonry bit, insert plastic anchors, and drive screws into the anchors. Position cameras 7–10 feet high to balance coverage and facial detail.
5. Add each camera by inserting batteries (observe polarity markings inside the compartment), then tapping “+” in the app and scanning the camera’s QR code. The camera clicks once when recognized. Test motion detection by walking through the frame: the app should alert within 5 seconds.
6. Configure settings: Name cameras by location (“Front Porch,” “Garage Side”), adjust motion sensitivity, and set up activity zones. Enable “Early Notification” if you want alerts the instant motion is detected, before the clip finishes recording.
Safety note: If mounting above 8 feet, use a stable ladder with a helper to steady it. Wear safety glasses when drilling overhead, masonry dust and wood chips fall directly into your face.
Best Blink Cameras for Different Home Areas
Blink Outdoor is the go-to for weather-exposed locations. Rated IP65, it handles rain, snow, and temperatures from -4°F to 113°F. Mount it under eaves when possible to extend battery life and reduce direct rain exposure on the lens. Ideal for driveway monitoring, backyard gates, and shed doors.
Blink Indoor lacks weather sealing but costs about $20 less per unit. Use it in garages, enclosed porches, or interior rooms like a home office or nursery. The smaller form factor is less obtrusive on interior walls, a consideration if aesthetics matter in finished living spaces.
Blink Video Doorbell replaces or supplements a traditional doorbell. It runs on two AA batteries (no hardwiring required) and mounts with a wedge adapter to angle the view downward toward packages. Standard mounting height is 48 inches from the ground. If replacing a wired doorbell, cap off the low-voltage wires with twist-on connectors, leave them live if you want to add an indoor chime later.
Blink Mini is the budget wired option, $35 and powered by a USB cable. It lacks batteries, so placement is limited to areas near outlets. Works well for monitoring a basement sump pump, entryway, or pet feeding station. Comparing systems on CNET and Digital Trends often reveals the Mini as a cost-effective way to expand coverage indoors without subscription dependence.
Coverage strategy: Start with one outdoor camera covering the most-used entry, typically the front door or driveway. Add a second camera on the garage or back door if those areas aren’t visible from the first. Indoor cameras make sense if you’ve experienced break-ins or want to monitor deliveries placed inside a vestibule.
Subscription Plans: Do You Need Blink Plus?
Blink Basic (free) includes live view, motion alerts, and two-way talk. Clips aren’t saved unless you plug a USB drive into the Sync Module 2 for local recording. This works fine for users who check notifications in real time or only need a live deterrent effect, cameras visible on the property often discourage casual theft.
Blink Subscription Plus costs $10/month per account (covers unlimited cameras) or $3/month per camera. It stores clips in the cloud for 60 days, enables person detection (reducing false alerts from animals or shadows), and includes extended warranties. Person detection uses basic AI to distinguish human shapes from other motion, not as refined as facial recognition but cuts notification noise significantly.
When to subscribe: High-traffic locations generate too many clips for manual USB drive management. If you’re away from home frequently or want evidence archived off-site in case a thief steals the Sync Module, cloud storage justifies the cost. For a single front-door camera checked daily, local storage on a USB stick usually suffices.
Cost comparison: A four-camera system paying per-camera costs $144/year: the unlimited plan is $120/year. Systems with three or more cameras break even with the account-wide plan. Households mixing Blink with other Amazon security devices (Ring, etc.) might bundle subscriptions through Amazon’s broader home plans, check current bundling offers before committing.
Integrating Blink with Your Smart Home Ecosystem
Alexa routines trigger Blink actions based on time, location, or other smart devices. Example: “When the smart lock disengages, disarm the indoor cameras.” Set this up in the Alexa app under Routines → Add Action → Smart Home → Cameras. Blink cameras also work as motion sensors in routines, useful for turning on lights when the driveway camera detects movement after dark.
IFTTT applets extend automation beyond Alexa. Popular applets include logging motion events to a Google Sheet or sending camera snapshots to Dropbox. IFTTT’s free tier supports three applets: the Pro tier ($5/month) removes that limit. Blink’s IFTTT integration works through the Sync Module, so setup requires linking both the Blink and IFTTT accounts.
SmartThings and Home Assistant compatibility is unofficial and requires community-developed plugins. These integrations can break when Blink updates its API, so they’re best for experienced tinkerers comfortable troubleshooting YAML configuration files and GitHub issues. For mainstream users sticking to Alexa, the native integration is reliable and doesn’t require workarounds.
No Apple HomeKit or Google Home support as of April 2026. Amazon has shown no indication of opening Blink to competing ecosystems. Households heavily invested in Siri or Google Assistant should consider this a dealbreaker, voice control and smart display integration won’t work outside Alexa devices.
Network requirements: Blink cameras connect via 2.4GHz Wi-Fi only. If your router broadcasts separate SSID names for 2.4GHz and 5GHz bands, ensure your phone connects to the 2.4GHz network during setup. Mesh systems (Eero, Google Wifi) usually handle this automatically, but single-SSID routers can confuse the process if the phone keeps switching bands.