Most baseboard heating systems run on outdated manual thermostats that waste energy and offer zero remote control. Upgrading to a smart thermostat sounds straightforward until homeowners realize their line voltage baseboard system isn’t compatible with most popular smart thermostats designed for forced-air furnaces. The fix requires specific hardware and a bit of electrical know-how, but the payoff, automated schedules, smartphone control, and 10-20% energy savings, makes it worth the effort. This guide walks through what makes baseboard systems different, which smart thermostats actually work, and what the installation process looks like.
Table of Contents
ToggleKey Takeaways
- A smart thermostat for baseboard heaters must be line voltage-rated (120V or 240V) and handle 15-20 amps, unlike mainstream models designed for low-voltage furnace systems.
- Popular line voltage options include Mysa, Stelpro Ki, Sinopé, and Caleo, each supporting up to 3,000-4,000 watts with smart home integration.
- Smart thermostats for baseboard heating systems deliver 10-20% energy savings through automated scheduling, with a typical 1,500-watt unit paying for itself in under a year.
- Verify your system’s voltage and amperage with a non-contact voltage tester before purchasing, and always turn off power at the breaker before installation.
- Geofencing and zone-by-zone control let you automate temperature based on occupancy and location, cutting runtime by 30-40% compared to manually controlled heaters.
- Hire a licensed electrician if your system uses relays, multiple zones with complex wiring, or if you’re uncomfortable working with line voltage circuits.
Why Baseboard Heaters Need Specialized Smart Thermostats
Baseboard heaters operate on line voltage (120V or 240V), pulling power directly from the electrical panel. Most mainstream smart thermostats, Nest, Ecobee, and similar, work with low voltage (24V) systems common in forced-air HVAC setups. Connecting a low-voltage thermostat to a line voltage circuit will fry the device instantly.
Line voltage systems also draw much higher amperage. A typical baseboard heater circuit pulls 15-20 amps, while a furnace thermostat might handle 1-2 amps. Smart thermostats built for baseboard heaters use heavy-duty relays or contactors to handle the load safely.
Another factor: baseboard heaters are often wired in series or parallel across multiple rooms. Some homes have a single thermostat controlling multiple zones, while others have individual units per room. The wiring configuration affects which smart thermostat will work and whether a relay box is needed.
Ignoring these differences leads to blown circuits, damaged thermostats, or worse, fire hazards. Always verify your system voltage and amperage before buying hardware.
Top Smart Thermostats Compatible with Baseboard Heating Systems
Few smart thermostats handle line voltage natively. Here are the proven options as of 2026:
Mysa Smart Thermostat is the most popular line voltage model, supporting 120V and 240V systems up to 3,800 watts per unit. It connects via Wi-Fi, integrates with Alexa, Google Assistant, and Apple HomeKit, and offers zone-by-zone control if you install multiple units. Installation is straightforward, two wires, no neutral required. Mysa works well in homes with multiple baseboard zones.
Stelpro Ki Thermostat handles up to 4,000 watts and works with 120V/240V systems. It includes a built-in GFCI, which is useful in bathrooms or other wet locations. The interface is simple, and it pairs with major smart home platforms. Slightly bulkier than Mysa, but reliable.
Sinopé TH1123WF and TH1124WF models support baseboard and convector heaters. The TH1123WF handles 3,000 watts and works with Wi-Fi and Zigbee hubs. The TH1124WF adds a power usage tracker. Both integrate with Samsung SmartThings and Hubitat.
Caleo Smart Thermostat is a budget option for single-zone setups. It caps at 3,600 watts and lacks some advanced scheduling features, but it’s a solid pick for renters or single-room upgrades.
If none of these fit, a relay/contactor setup lets you use a low-voltage smart thermostat (like Nest or Ecobee) with line voltage baseboard heaters. The thermostat controls the relay, which switches the high-voltage circuit. This adds complexity and cost but opens up more thermostat options.
Line Voltage vs. Low Voltage: Understanding Your System
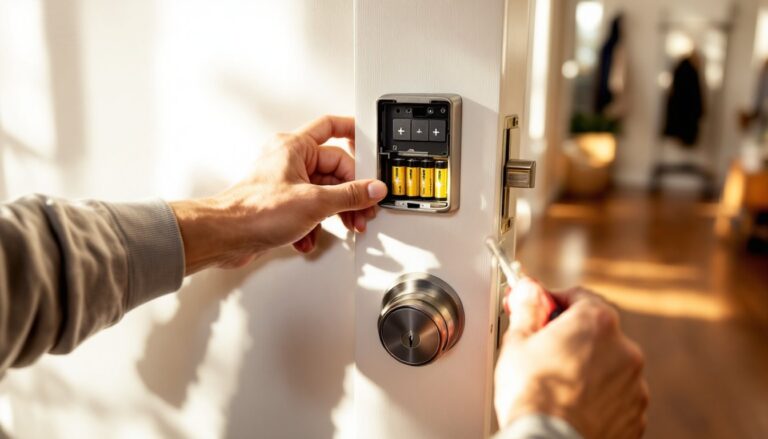
Before buying anything, confirm your system type. Turn off power at the breaker, remove the existing thermostat, and check the wiring.
Line voltage systems have two thick wires (usually 12 AWG or 14 AWG) running directly from the heater to the thermostat. No transformer, no extra wires. Voltage is 120V or 240V.
Low voltage systems have a bundle of thin wires (18-22 AWG) connected to a transformer, usually located at the furnace or air handler. Common wire colors include red (R), white (W), green (G), and sometimes yellow (Y) or blue (C). Voltage is 24V.
Use a non-contact voltage tester or multimeter to double-check. If you’re reading 120V or 240V at the thermostat terminals, it’s line voltage. If it’s 24V, it’s low voltage.
Don’t guess. Installing the wrong thermostat voids warranties and creates serious safety risks.
Installation Essentials: What You Need to Know Before You Start
Permits and codes: Most jurisdictions require a permit for any work on 120V or 240V circuits. Some allow homeowner-installed thermostats under existing circuits, but rules vary. Check with your local building department.
Safety first: Turn off power at the breaker. Use a non-contact voltage tester to confirm the circuit is dead before touching any wires. Wear safety glasses and insulated gloves.
Tools needed:
- Non-contact voltage tester or multimeter
- Insulated screwdrivers (flathead and Phillips)
- Wire strippers
- Wire nuts (if splicing)
- Drill and level (for mounting)
- Electrical tape
Wiring basics: Line voltage thermostats are simple, two wires, line in and line out. Polarity doesn’t usually matter for resistive loads like baseboard heaters, but double-check the thermostat’s manual. Some models label terminals as L1 and L2 (for 240V) or Line and Load (for 120V).
If your heater uses 240V, you’ll have two hot wires (often black and red, or both black). There’s no neutral. Some smart thermostats require a neutral for Wi-Fi power: if your box doesn’t have one, you’ll need a model that draws power from the line itself (like Mysa or Stelpro).
Common mistakes:
- Forgetting to label wires before disconnecting the old thermostat. Take a photo.
- Skipping the voltage test. Always verify.
- Overtightening terminal screws and damaging stranded wire.
- Installing in a location with poor Wi-Fi signal. Test signal strength before mounting.
When to call a pro: If your system has more than two wires, uses a relay setup, or if you’re uncomfortable working with line voltage, hire a licensed electrician. The cost, typically $150–$300 for a thermostat swap, is cheaper than a shock or a fire.
Key Features to Look For in a Baseboard Heater Smart Thermostat
Wattage capacity: Match or exceed your heater’s wattage. A 1,500-watt baseboard heater needs a thermostat rated for at least 1,500 watts, but 2,000+ watts provides headroom. Check the heater’s nameplate or multiply amps by voltage (e.g., 12.5A × 120V = 1,500W).
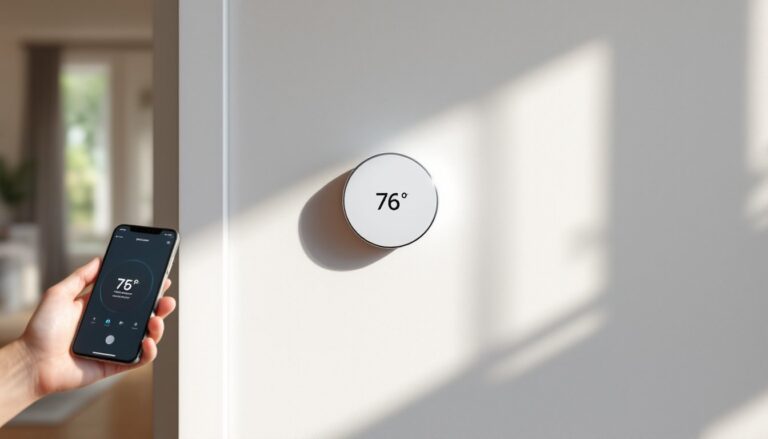
Smart home integration: Most line voltage thermostats work with Alexa, Google Assistant, and Apple HomeKit. If you’re already invested in a smart home ecosystem, confirm compatibility before buying. Many reviews on home automation platforms highlight integration quirks worth knowing.
Multi-zone control: Homes with baseboard heat in several rooms benefit from individual thermostats per zone. Look for systems that sync scheduling across zones or offer a unified app interface.
Geofencing and occupancy sensing: Geofencing adjusts temperature based on your phone’s location, turning heat down when you leave. Occupancy sensors detect motion and adjust accordingly, useful in bedrooms or offices.
Energy reporting: Some models track daily or monthly energy use. This data helps identify waste and justify the upgrade cost. Sinopé and Mysa both offer this feature.
Manual override: Physical buttons or a touchscreen let you adjust temperature without opening the app. Essential when Wi-Fi drops or guests need quick control.
Backlit display: Helpful in dark hallways or bedrooms. Some thermostats dim or turn off the display at night to avoid light pollution.
Open window detection: Advanced models sense rapid temperature drops (like an open window) and pause heating to avoid waste. More common in European models, but appearing in North American products.
Skip gimmicks like voice-controlled color displays unless you’ll actually use them. Focus on load capacity, reliable connectivity, and straightforward scheduling.
Energy Savings and Smart Scheduling Benefits
Smart thermostats reduce baseboard heating costs by eliminating constant on/off cycles and optimizing runtime. Studies show 10-20% energy savings in homes that switch from manual to programmable or smart thermostats.
Baseboard heaters are notoriously inefficient when left at constant high temps. Many homeowners set them to 70°F and forget them. A smart thermostat drops the temperature during sleep hours and when the house is empty, then preheats 30 minutes before you arrive home.
Example schedule for a bedroom:
- 6:00 AM – 7:30 AM: 68°F (morning warm-up)
- 7:30 AM – 5:00 PM: 60°F (away mode)
- 5:00 PM – 10:00 PM: 70°F (evening comfort)
- 10:00 PM – 6:00 AM: 62°F (sleep mode)
That schedule alone cuts runtime by 30-40% compared to leaving the heater at 70°F all day.
Geofencing adds another layer. If you leave early or come home late, the thermostat adjusts automatically. No more heating an empty house or returning to a cold bedroom.
Real-world numbers: A 1,500-watt baseboard heater running 8 hours/day at $0.15/kWh costs about $54/month. Cutting runtime by 20% saves roughly $11/month, or $132/year. A $120 smart thermostat pays for itself in 11 months.
Multiply that across three or four zones, and annual savings hit $400-500. In cold climates where baseboard heaters run November through March, the ROI is even faster.
Energy reporting helps fine-tune schedules. If the data shows heavy usage between 2-4 PM when no one’s home, adjust the away-mode window.
According to testing covered by smart home reviewers, the biggest gains come from consistent scheduling, not fancy AI learning. Set it once, tweak as needed, and let it run.
Conclusion
Upgrading baseboard heaters to smart control isn’t as plug-and-play as swapping a low-voltage thermostat, but it’s manageable with the right hardware and a bit of electrical caution. Stick to line voltage models, verify your system’s wattage and voltage, and don’t skip the breaker shutoff. The energy savings and convenience, especially in multi-zone homes, make it one of the better ROI projects for electric heat users.