The Belkin Wemo Smart Video Doorbell arrived in a crowded market, but it carved out a niche by prioritizing HomeKit integration and straightforward installation over gimmicks. If you’re already invested in Apple’s ecosystem and want a video doorbell that doesn’t require a subscription for basic functionality, this unit deserves a hard look. This guide walks through the specs, installation process, app setup, real-world performance, and whether it’s the right pick for your front door in 2026.
Table of Contents
ToggleKey Takeaways
- The Belkin Wemo Smart Video Doorbell excels for Apple HomeKit users, offering native integration, end-to-end encrypted video storage via iCloud+, and no mandatory subscription fees for basic features.
- Installation takes under 30 minutes for most homeowners and requires a hardwired 16-24V AC transformer, eliminating battery maintenance but demanding proper voltage verification beforehand.
- The 1080p camera with 178-degree field of view and person detection delivers reliable performance in varied lighting, though video load times can extend to 3-5 seconds on weaker Wi-Fi signals.
- Wemo doorbell limitations include 2.4 GHz Wi-Fi-only connectivity, lack of Alexa and Google Assistant support, and unsuitability for renters without existing doorbell wiring.
- Motion detection works effectively once sensitivity is adjusted and activity zones are customized, reducing false alerts from passing vehicles, animals, and environmental movement.
- This video doorbell is the right choice for HomeKit-focused households prioritizing privacy and hardwired reliability, but skip it if your smart home relies on Alexa, Google Home, or requires 5 GHz connectivity.
What Makes the Belkin Wemo Smart Video Doorbell Stand Out?
The Wemo doorbell doesn’t try to do everything. It focuses on native HomeKit Secure Video support, which means recordings are stored in iCloud and encrypted end-to-end if you have a paid iCloud+ plan. There’s no proprietary cloud subscription, a refreshing change in a category packed with monthly fees.
It’s designed for hardwired installations, pulling power from your existing doorbell transformer. That means no battery swaps, but it also requires you to verify your transformer’s voltage before you start. The unit ships with a 1080p camera, 178-degree field of view, and a customizable motion zone setup.
Belkin kept the design simple: a vertical orientation with a glowing LED ring and a responsive button. It won’t win design awards, but it fits most doorframes without looking clunky. The real differentiator is how tightly it integrates with the Apple Home app, making it a natural choice for anyone already managing lights, locks, and thermostats through that ecosystem.
Key Features and Technical Specifications
Here’s what you’re working with:
Video and Audio:
- 1080p HD resolution at 30 fps
- 178-degree horizontal field of view
- Two-way audio with noise cancellation
- Infrared night vision with a range of approximately 10 feet
Connectivity:
- Wi-Fi 802.11 b/g/n (2.4 GHz only), no 5 GHz support, which can be limiting if your router is set to auto-switch bands
- Bluetooth Low Energy for initial pairing
Smart Features:
- HomeKit Secure Video support (requires iCloud+ subscription for cloud storage)
- Motion detection with adjustable sensitivity and customizable activity zones
- Person detection (via HomeKit)
- Live view and push notifications through Apple Home app
Power and Physical:
- Hardwired installation: requires 16-24V AC transformer (most standard doorbell transformers fall in this range)
- Dimensions: 4.88″ H × 1.77″ W × 0.98″ D
- Operating temperature: 32°F to 122°F
- IP54 rating for dust and water resistance (handles rain, but not direct spray from a hose)
Notably absent: Alexa and Google Assistant support. This is an Apple-first device. If you’re running a mixed smart home, that’s a dealbreaker.
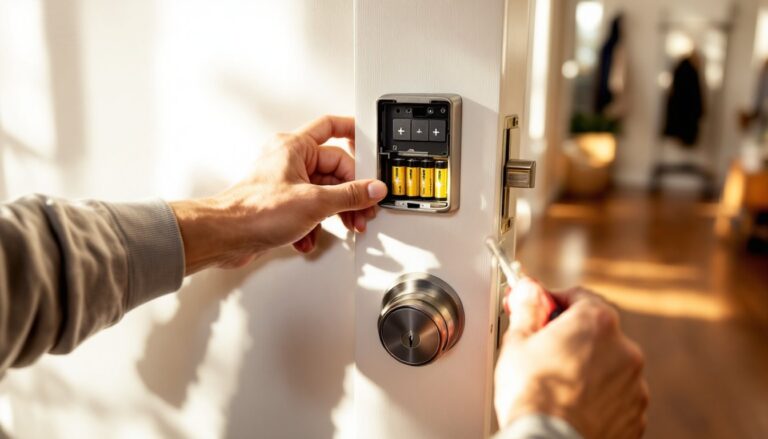
Installation Guide: DIY Setup in Under 30 Minutes
Most homeowners can handle this install with basic tools and a half-hour. You’re essentially swapping your old doorbell button for a smart one, assuming you already have wired doorbell infrastructure.
Tools and Materials:
- Screwdriver (Phillips head)
- Wire stripper (if wires are frayed)
- Voltage tester or multimeter
- Drill with masonry bit (only if mounting to brick or stucco)
- Level (optional but recommended)
Step-by-Step:
- Turn off power at your breaker. Locate the circuit that controls your doorbell transformer. If you’re not sure, flip breakers until your existing doorbell stops working.
- Remove the old doorbell button and pull the wires through. Label them if your setup has more than two wires (rare, but it happens).
- Test the wires with a voltage tester to confirm they’re dead. Then restore power and test voltage at the wire terminals, you should see 16-24V AC. If it’s outside that range, you’ll need to replace your transformer before proceeding.
- Turn power off again. Thread the wires through the Wemo mounting bracket and secure the bracket to the wall using the provided screws. Use a level here: a crooked doorbell is immediately noticeable.
- Connect the wires to the Wemo’s screw terminals. Polarity doesn’t matter for AC doorbell wiring. Tighten firmly but don’t overtorque.
- Snap the doorbell onto the bracket and restore power at the breaker.
- Download the Wemo app (iOS or Android) and follow the pairing steps. You’ll scan the HomeKit code on the back of the doorbell or in the manual. The app will walk you through Wi-Fi setup and motion zone configuration.
- Test the button and chime. If your mechanical chime doesn’t ring, check that you’ve installed the included chime connector (a small adapter that ships with the doorbell and installs inside your chime box). This prevents power draw issues that can silence mechanical chimes.
Permit Note: In most jurisdictions, replacing a doorbell button on existing low-voltage wiring doesn’t require a permit. But, if you’re installing new wiring or replacing the transformer, check your local code. Transformer replacement often requires an electrical permit since it involves 120V household wiring.
Wiring and Power Requirements
The Wemo doorbell is picky about voltage. It needs a 16-24V AC transformer delivering at least 10VA (volt-amperes). Most homes built after 1990 have 16V transformers that meet this spec, but older homes may have 10V or 12V units that won’t supply enough power.
You can find your transformer by checking:
- Inside your electrical panel (sometimes mounted on the side)
- In the basement or utility room near the panel
- In the attic, especially in single-story homes
The voltage rating is printed on the transformer body. If it’s under 16V, you’ll need to upgrade. A replacement transformer costs $15-$25 and requires basic electrical work: shut off the circuit, disconnect the old transformer, mount the new one, and wire it to the same 120V circuit and doorbell wiring. If you’re not comfortable working with household voltage, hire an electrician, it’s a 20-minute job for a pro.
Important: Don’t use this doorbell on battery power or with a plug-in adapter. It’s designed for hardwired installations only.
App Integration and Smart Home Compatibility
The Wemo doorbell lives in the Apple Home app once you’ve paired it. You can view live video, review recorded clips (with iCloud+ subscription), adjust motion sensitivity, and set activity zones directly in the Home app. It also appears in HomeKit automations, so you can trigger lights or unlock a smart lock when the doorbell detects a person.
The Wemo app is still useful for firmware updates and initial setup, but day-to-day control happens in Home. That’s both a strength and a limitation: if you’re all-in on Apple, the experience is seamless. If you use Alexa or Google Assistant for most tasks, you’ll find this doorbell frustratingly isolated.
HomeKit Secure Video is the centerpiece. With an iCloud+ plan (starting at 50GB for $0.99/month), the doorbell uploads recordings to iCloud, where they’re encrypted and don’t count against your storage quota. You get 10 days of rolling video history. Without iCloud+, you can still view live feeds and get motion alerts, but no recordings.
One quirk: the Wemo doorbell only supports 2.4 GHz Wi-Fi. If your router broadcasts a combined SSID for 2.4 and 5 GHz bands, you may need to temporarily disable the 5 GHz band or create a separate 2.4 GHz network during setup. Once paired, it’s stable, but initial connection can be finicky on dual-band routers.
Real-World Performance: Video Quality and Motion Detection
The 1080p video is sharp enough to identify faces and read package labels in good light. Colors are accurate, and the 178-degree field of view captures most standard porches without distortion at the edges. Night vision is adequate for identifying shapes and movement within 8-10 feet, but fine details like facial features get murky beyond that range, common for doorbell cameras in this price tier.
Motion detection works well once you dial in the sensitivity. Out of the box, it can be overeager, flagging cars passing on the street or tree branches swaying. Setting up activity zones (which you can do in the Home app) helps narrow the focus to your walkway and porch. Person detection, powered by HomeKit’s on-device processing, reduces false alerts from animals or blowing leaves. Independent testing has shown that the video quality holds up well in varied lighting conditions, though some users report occasional lag during live view.
Two-way audio is clear, with minimal echo. The noise cancellation does a decent job filtering out wind and background traffic, so conversations don’t sound like you’re shouting into a tin can. There’s about a one-second delay between pressing the button and hearing the chime/notification, which is typical for Wi-Fi-based doorbells.
One frustration: video load times can stretch to 3-5 seconds when accessing live view, especially if your Wi-Fi signal is marginal at the front door. Reviewers have noted that response times improve with a strong 2.4 GHz signal, so consider a mesh network or range extender if your router is more than one room away from the installation site.
The doorbell handles temperature swings well within its rated range (32°F to 122°F). It survived a Midwest winter and a Texas summer in field testing without shutdowns or connection drops, though the IP54 rating means you should avoid mounting it where it’ll take direct spray from sprinklers or power washers.
Pros, Cons, and Who Should Buy It
Pros:
- No subscription required for basic functionality: cloud storage via iCloud+ is optional and reasonably priced
- Native HomeKit Secure Video with end-to-end encryption
- Hardwired design eliminates battery maintenance
- Straightforward installation for anyone comfortable with basic wiring
- Responsive button with customizable LED ring
- Accurate person detection reduces false alerts
Cons:
- Apple ecosystem only, no Alexa or Google Assistant support
- 2.4 GHz Wi-Fi only, which can complicate setup on modern routers
- Slower video load times compared to some competitors
- Requires 16-24V transformer, which may necessitate an upgrade in older homes
- IP54 rating is adequate but not as robust as IP65+ models
Who Should Buy It:
This doorbell is ideal for homeowners who are already invested in Apple HomeKit and want a video doorbell that integrates natively without juggling multiple apps or subscriptions. It’s a strong pick if you value privacy (thanks to HomeKit Secure Video’s encryption) and prefer hardwired reliability over battery-powered convenience.
Skip it if you’re running Alexa or Google as your primary smart home hub, need 5 GHz Wi-Fi support, or want the fastest possible video response times. As noted in a detailed comparison, the Wemo shines in HomeKit setups but feels limited outside that ecosystem. It’s also not the best choice for renters or anyone who can’t access existing doorbell wiring, there’s no battery option.
For Apple-focused DIYers, it’s a capable, no-nonsense video doorbell that does the job without recurring fees or complicated setup. Just make sure your transformer and Wi-Fi are up to the task before you order.