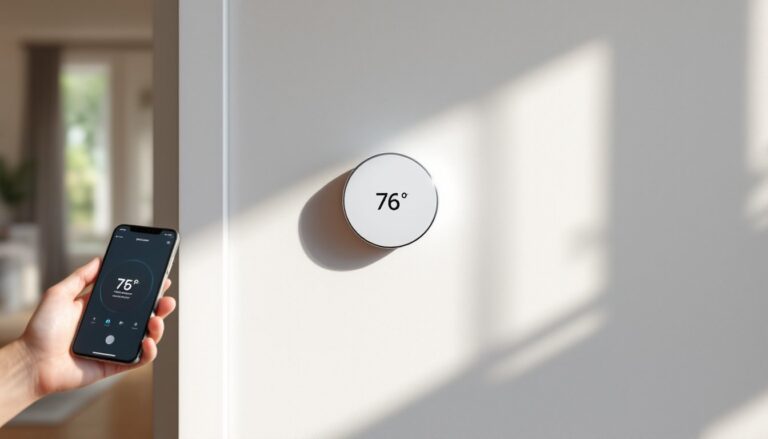
A programmable thermostat saves money. A WiFi smart thermostat saves money while you’re sitting on the beach. Honeywell’s lineup brings decades of HVAC credibility into the connected home era, meaning reliable hardware, straightforward apps, and compatibility with most residential systems without the learning curve of flashier competitors.
Whether you’re upgrading from a mechanical dial or replacing a basic digital unit, Honeywell’s WiFi-enabled models offer remote control, scheduling, and energy reporting that can trim 10–23% off heating and cooling bills. They work with most 24V HVAC systems (gas, electric, heat pump, and multi-stage setups), fit standard wall boxes, and don’t require a C-wire on many models. This guide walks through model selection, installation, setup, and troubleshooting so homeowners can install and optimize their own system in an afternoon.
Table of Contents
ToggleKey Takeaways
- Honeywell WiFi smart thermostats can reduce heating and cooling costs by 10–23% through remote control, scheduling, and energy reporting without subscription fees.
- The three main models—T9, T6 Pro, and T5 Plus—cater to different needs: T9 supports room sensors for multi-zone homes, T6 Pro balances features and price with or without a C-wire, and T5 Plus is budget-friendly for single-zone setups.
- Installation typically takes 30–45 minutes and requires only a screwdriver and basic electrical safety knowledge; a C-wire adapter is available if your system lacks a common wire.
- Honeywell’s WiFi smart thermostat maximizes savings when paired with realistic temperature scheduling (7–10°F setback recommended), geofencing automation, and home envelope improvements like air sealing and filter maintenance.
- WiFi connectivity issues are usually solved by improving router placement within one room of the thermostat, using the 2.4 GHz band, and ensuring Location Services are enabled in the Resideo app for geofencing.
What Makes Honeywell WiFi Smart Thermostats Stand Out?
Honeywell’s strength lies in backward compatibility and no-subscription functionality. Unlike some competitors that lock features behind monthly fees, Honeywell’s app and cloud services are free for life. The company also supports a wide range of HVAC configurations, including older systems with proprietary wiring, through adapter kits and flexible terminal blocks.
Most models use adaptive recovery learning, which calculates how long your system needs to reach the target temperature by your scheduled time. Instead of starting heat at 6:00 AM sharp, the thermostat might fire the furnace at 5:42 AM so the house hits 68°F exactly at 6:00 AM. This reduces energy waste from overshooting or running the system longer than necessary.
The Resideo app (Honeywell Home) provides geofencing, which adjusts settings when your phone leaves or approaches home, plus 7-day flexible scheduling with up to four periods per day. Voice control works with Alexa, Google Assistant, and Siri Shortcuts. Installation is straightforward for anyone comfortable with a screwdriver and basic electrical safety, most swaps take 30–45 minutes.
Top Honeywell WiFi Smart Thermostat Models for Your Home
T9 Smart Thermostat with Smart Room Sensors: The flagship model supports remote temperature and humidity sensors (sold separately) so the system averages readings from multiple rooms or prioritizes occupied spaces. Ideal for homes with hot/cold zones or if the main thermostat sits in a hallway that doesn’t reflect actual living areas. Requires a C-wire (24V common) for power, check your existing setup or plan to install one.
T6 Pro WiFi Thermostat: A contractor-favorite that balances features and price. Works with or without a C-wire (uses battery backup if absent). Supports multi-stage heating/cooling, heat pumps with auxiliary heat, and humidifier/dehumidifier control. The 3.5-inch color touchscreen is easy to read from across the room. No room sensor support, but geofencing and scheduling are fully functional.
T5 Plus Smart Thermostat: Budget-friendly option with the same app and voice control as pricier models. Uses AA batteries if no C-wire is present. The display is smaller (2 inches, monochrome), but programming and remote adjustments work identically. Best for single-zone homes with standard HVAC and no auxiliary equipment.
All three models appear in recent smart thermostat roundups for their reliability and straightforward setup. Choose based on your system’s wiring (C-wire availability), whether you need room sensors, and screen preference.
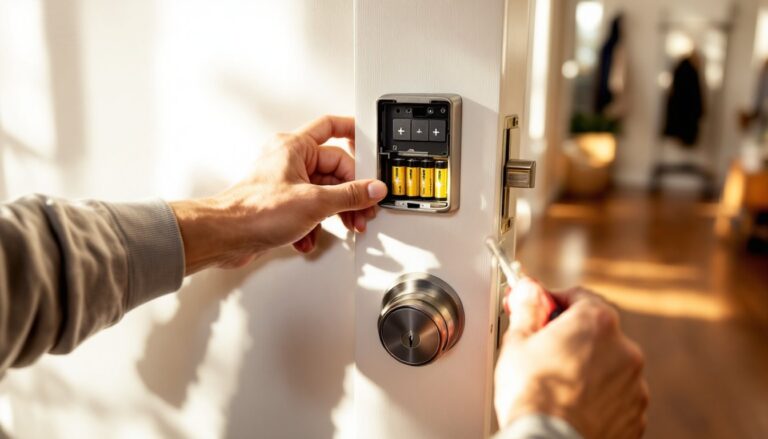
How to Install Your Honeywell WiFi Smart Thermostat
Safety first: Turn off power to your HVAC system at the breaker panel. Most systems run on 24V, but the air handler or furnace itself operates at 120V or 240V. Don’t skip this step.
What you’ll need:
- Phillips screwdriver
- Smartphone with Resideo app installed
- Painter’s tape and pen (for labeling wires)
- Wire strippers (if extending or repairing wire ends)
- Level (optional, for aesthetics)
Step-by-step installation:
- Photograph the old wiring. Take a clear shot of terminal labels (R, C, W, Y, G, etc.) before removing any wires.
- Label each wire with tape as you disconnect it. Typical terminals: R (24V power), C (common/neutral), W (heat), Y (cooling), G (fan).
- Remove the old thermostat base from the wall. If the wall plate is larger than the new Honeywell base, patch and paint, or use the included trim plate.
- Thread wires through the new base and mount it to the wall using provided anchors and screws. Use a level if you care about aesthetics, nobody likes a crooked thermostat.
- Connect wires to matching terminals on the Honeywell base. Push each wire in firmly until the terminal clicks. Strip ¼ inch of insulation if ends are frayed.
- Attach the thermostat display by aligning it with the base and pressing until it snaps.
- Restore power at the breaker panel.
The thermostat will boot up and prompt you through system configuration (heating type, cooling stages, fan settings). Answer honestly, the wrong setup can short-cycle your equipment or fail to call for auxiliary heat when needed. If your system uses a heat pump with emergency heat, the thermostat needs to know.
C-wire workaround: If you have no C-wire and the model requires one, you can install a 24V power adapter (sometimes called a C-wire adapter or add-a-wire kit) at the air handler. This repurposes the unused G-wire or adds a transformer. If you’re uncomfortable working inside the air handler, hire an HVAC tech for this part, it’s a 15-minute job for a pro.
Setting Up WiFi Connectivity and Smart Features
After power-on, the thermostat will display a WiFi setup prompt. Press the Menu button, navigate to WiFi Setup, and select your home network. The display shows a WPS option (if your router supports push-button pairing) or manual SSID entry.
Manual connection steps:
- Select your network name from the list.
- Enter your WiFi password using the touchscreen keyboard. Honeywell thermostats support 2.4 GHz networks only, 5 GHz won’t appear in the list. If your router broadcasts a combined SSID, temporarily disable 5 GHz band steering in router settings or create a separate 2.4 GHz SSID.
- Confirm connection. The thermostat will display a MAC address and successful connection message.
Resideo app pairing:
- Download Resideo (formerly Honeywell Home) from the App Store or Google Play.
- Create an account or log in.
- Tap Add New Device and scan the QR code on the thermostat’s display (Menu > WiFi Info).
- Follow prompts to name the thermostat, set your location, and configure geofencing radius (typically 1–7 miles).
Voice assistant linking:
- Alexa: Enable the Resideo skill in the Alexa app, link your account, and discover devices. Use commands like “Alexa, set the thermostat to 72.”
- Google Home: Link Resideo in the Google Home app under Works with Google. Say “Hey Google, what’s the temperature inside?”
- Siri Shortcuts: Add custom shortcuts in the Shortcuts app (iOS) for scenes like “Leaving home” that set the thermostat to Away mode.
Many 2026 smart thermostat reviews highlight Honeywell’s straightforward app interface compared to competitors with cluttered dashboards or delayed cloud syncing.
Maximizing Energy Savings with Your Honeywell Thermostat
A smart thermostat only saves money if you use its features. Default settings won’t cut your bills, programming and automation do the heavy lifting.
Set realistic schedules: Most households benefit from four daily periods: Wake, Leave, Return, Sleep. Program temperatures you’ll actually tolerate, setting heat to 55°F while you’re at work sounds thrifty, but the recovery energy spike often cancels savings. The U.S. Department of Energy recommends a 7–10°F setback for eight hours daily, which typically saves around 10% annually on heating and cooling.
Enable geofencing: The Resideo app uses your phone’s location to switch between Home and Away modes automatically. Set your comfort radius (how close you need to be before the system starts conditioning), and adjust the Away temperature, usually 60°F in winter, 80°F in summer. This prevents unnecessary heating or cooling when everyone’s gone longer than expected.
Use Smart Room Sensors (T9 only): Place sensors in bedrooms, home offices, or bonus rooms. Configure the app to prioritize occupied rooms during specific periods (e.g., bedrooms at night, living room during the day). This prevents the system from heating an empty living room just because the thermostat in the hallway is cold.
Monitor energy reports: The app generates monthly usage charts showing runtime hours and temperature patterns. Compare month-over-month data to identify waste, if your system runs constantly during mild weather, check air filters, duct leaks, or insulation.
Combine with other efficiency measures: A smart thermostat can’t fix a poorly insulated attic or leaky ductwork. Seal obvious air leaks around windows, doors, and rim joists with caulk or spray foam. Replace furnace filters every 1–3 months depending on type (fiberglass, pleated, or HEPA). These steps compound thermostat savings.
Experts on leading smart home sites note that pairing a WiFi thermostat with attention to home envelope details delivers the best ROI, often recovering the device cost within one heating season.
Troubleshooting Common Honeywell WiFi Thermostat Issues
Thermostat won’t power on: Check breaker panel and furnace power switch (usually mounted on or near the unit, looks like a light switch). Confirm the R-wire is seated firmly in the R-terminal. If using battery backup, replace batteries (most models use AA). If still dead, measure voltage at the R and C terminals with a multimeter, should read 24VAC. No voltage means a blown transformer fuse in the air handler or a failed transformer.
WiFi connection drops frequently: Honeywell thermostats have weaker radios than phones. If the router is more than one room away or on a different floor, signal may be marginal. Move the router closer, add a mesh node, or use a WiFi extender on the 2.4 GHz band. Avoid placing the thermostat near metal ductwork or inside a closet, both kill signal.
System short-cycles (turns on and off rapidly): Usually caused by wrong system configuration during setup. Go to Menu > System Setup and verify heating/cooling stages, fan type, and cycle rate. If you have a heat pump, confirm the thermostat knows it’s a heat pump, selecting “Gas Furnace” by mistake will cause erratic behavior. Also check air filter, a clogged filter causes pressure imbalance and safety shutoffs.
Geofencing not triggering: Open the Resideo app and confirm Location Services are set to “Always” (not “While Using”). Check that your phone’s battery saver mode isn’t killing background app activity. If multiple phones are linked to one account, the thermostat waits until all phones leave the geofence before switching to Away, adjust settings if one person works from home.
“No C-wire detected” error (on models requiring C-wire): The C-wire completes the 24V circuit and powers the thermostat’s WiFi radio. If your system lacks a C-wire, you’ll need to either run a new wire from the air handler (requires pulling cable through walls, difficult retrofit) or install a power extender kit at the furnace. Honeywell sells the C-Wire Power Adapter (part #C-Wire-PEK), which comes with some models. Installation takes 10–15 minutes at the air handler and doesn’t require a licensed electrician in most jurisdictions.
App shows “offline” but thermostat functions locally: The thermostat can control your HVAC without internet, only remote access is lost. Restart your router, confirm the thermostat still shows a WiFi icon, and check for Resideo app or cloud service outages (rare but they happen). If the thermostat lost WiFi credentials after a power outage, re-enter the password.
Conclusion
Honeywell WiFi smart thermostats deliver reliable remote access, energy savings, and compatibility with a wide range of HVAC systems, all without recurring fees. Installation is a straightforward afternoon project for most DIYers, especially if a C-wire already exists. The real payoff comes from using scheduling, geofencing, and room sensors to match heating and cooling to actual occupancy, not guesswork. Combined with basic home sealing and filter maintenance, these devices typically recover their cost within one to two seasons.